

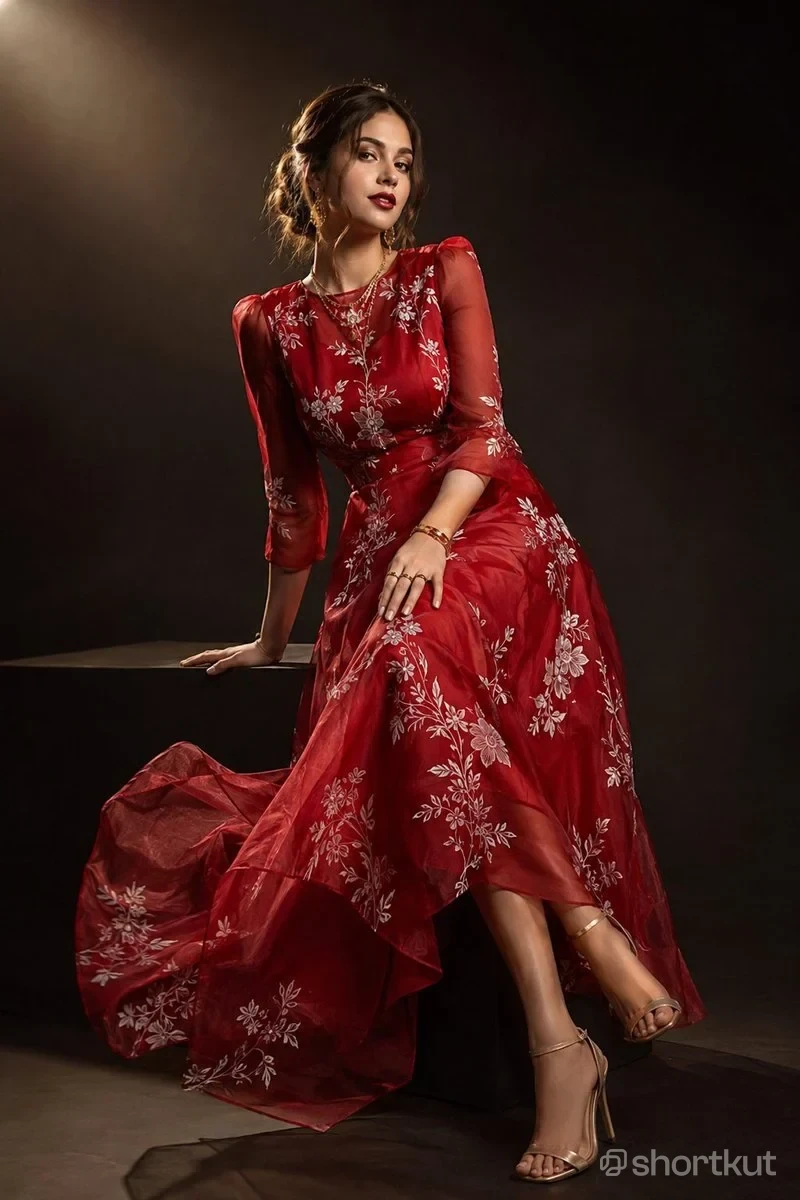
Create a photorealistic luxury fashion editorial portrait using the uploaded photo as the sole identity reference. Follow the scene description below; no additional reference image is needed.

IDENTITY AND FACE — HIGHEST PRIORITY
Preserve the uploaded person’s face without changing their facial features, proportions, skin tone, age, or distinguishing details. Keep their exact eye shape, eyebrows, nose, lips, jawline, cheeks, natural asymmetry, and skin texture. Preserve facial hair where present. Do not beautify, slim, smooth, reshape, or substitute a generic fashion-model face.

Retain the uploaded photo’s facial expression, head angle, and gaze when changing them would alter the person’s likeness. Where supported, preserve the original face pixels and construct the scene around them. Adapt the surrounding lighting to the face. Do not add makeup that changes their appearance. Identity preservation takes precedence over all styling and pose instructions.

FORMAT AND FRAMING
Vertical 2:3 composition, full-length seated portrait. Show the entire outfit, trailing skirt, and both shoes. Leave generous dark negative space above and beside the person, with a small margin below the lowest shoe. Use a natural portrait perspective without wide-angle distortion.

Place the head near the upper center, roughly one-third of the frame’s width from the left to its center region. The figure forms a gentle diagonal from the head toward the feet at the lower right. The flowing gown spreads across the lower-left portion of the frame.

SETTING
A minimal studio with a seamless dark chocolate-brown to near-black backdrop and a matte warm-brown floor. Use large, plain, dark rectangular studio platforms as seating and support. A low platform extends in from the left at approximately hip height; the central seat is mostly hidden by the dress. Keep the scene uncluttered, with no decorative props.

POSE
Seat the person sideways near the front edge of the dark platform, with their torso turned toward the camera and leaning slightly toward the viewer’s left.

The arm on the viewer’s left extends down and outward, with the palm resting flat on the platform and fingers naturally spread. The opposite hand rests gently on the raised knee, with relaxed fingers pointing downward.

Angle the knees toward the viewer’s right. Cross the lower legs gracefully: one leg extends toward the floor near the bottom center-right, while the other angles farther right, its shoe slightly raised and behind the forward leg. Keep the posture elegant, comfortable, and anatomically believable.

Match the body pose to the uploaded person’s existing head angle rather than changing the face to force a pose.

DRESS
Dress the person in a deep ruby-red, floor-length evening gown made from translucent organza or chiffon over a matching red lining.

Include:
• A modest rounded neckline and fitted bodice.
• A defined natural waist.
• Subtly puffed shoulders.
• Sheer three-quarter-length sleeves.
• Fine ivory and muted champagne floral embroidery, with delicate branching stems, small leaves, and scattered blossoms across the bodice, sleeves, and skirt.
• A full, flowing skirt with layered translucent folds.
• A long train spilling over the seat and pooling broadly across the floor toward the lower-left corner.
• A naturally lifted front hem caused by the seated pose, revealing the lower legs without a high thigh slit.

The fabric should have realistic transparency, fine texture, soft luster, visible seams, and convincing weight. Use rich scarlet highlights and deep burgundy shadows. Keep the embroidered flowers delicate and individually defined.

ACCESSORIES AND HAIR
Add understated gold jewelry: fine layered necklaces, small dangling earrings, slim bracelets, and a few delicate rings. Use metallic champagne-gold open-toe stiletto sandals with thin toe straps and slender ankle straps.

Preserve the uploaded person’s hair color, hairline, and texture. If their hair is long enough, arrange it into a loose low updo with a few natural face-framing strands. If it is short, retain its existing length and shape. Do not invent long hair or alter facial hair.

LIGHTING
Use warm, dramatic studio lighting with a large directional key light high on the viewer’s left, outside the frame. Create a soft amber glow in the upper-left background, fading gradually into near-black on the right.

Illuminate the face gently while preserving its original appearance. Let the light define the shoulders, sheer sleeves, floral embroidery, hands, and folds of the red skirt. Add a subtle warm rim along the hair and upper shoulder. Keep shadows deep but retain detail in the dress and skin. Cast soft, believable shadows across the floor and platforms.

PHOTOGRAPHIC FINISH
High-end fashion-magazine photography with realistic skin, detailed embroidery, fine hair strands, natural hands, and crisp jewelry. Use an approximately 85 mm portrait-lens perspective, with the person and dress in clear focus and the background smooth and unobtrusive. Color palette: ruby red, dark warm brown, soft ivory, and muted gold.

AVOID
Changes to facial identity, beauty filters, altered facial proportions, skin lightening, artificial symmetry, exaggerated makeup, plastic skin, illustrated rendering, distorted hands, extra fingers, twisted ankles, duplicated jewelry, stiff fabric, oversized flowers, bright backgrounds, additional furniture, cropped shoes, cropped train, text, logos, borders, or watermarks.

OUTPUT
One finished photorealistic vertical fashion portrait. Preserve the uploaded person’s face above all else.

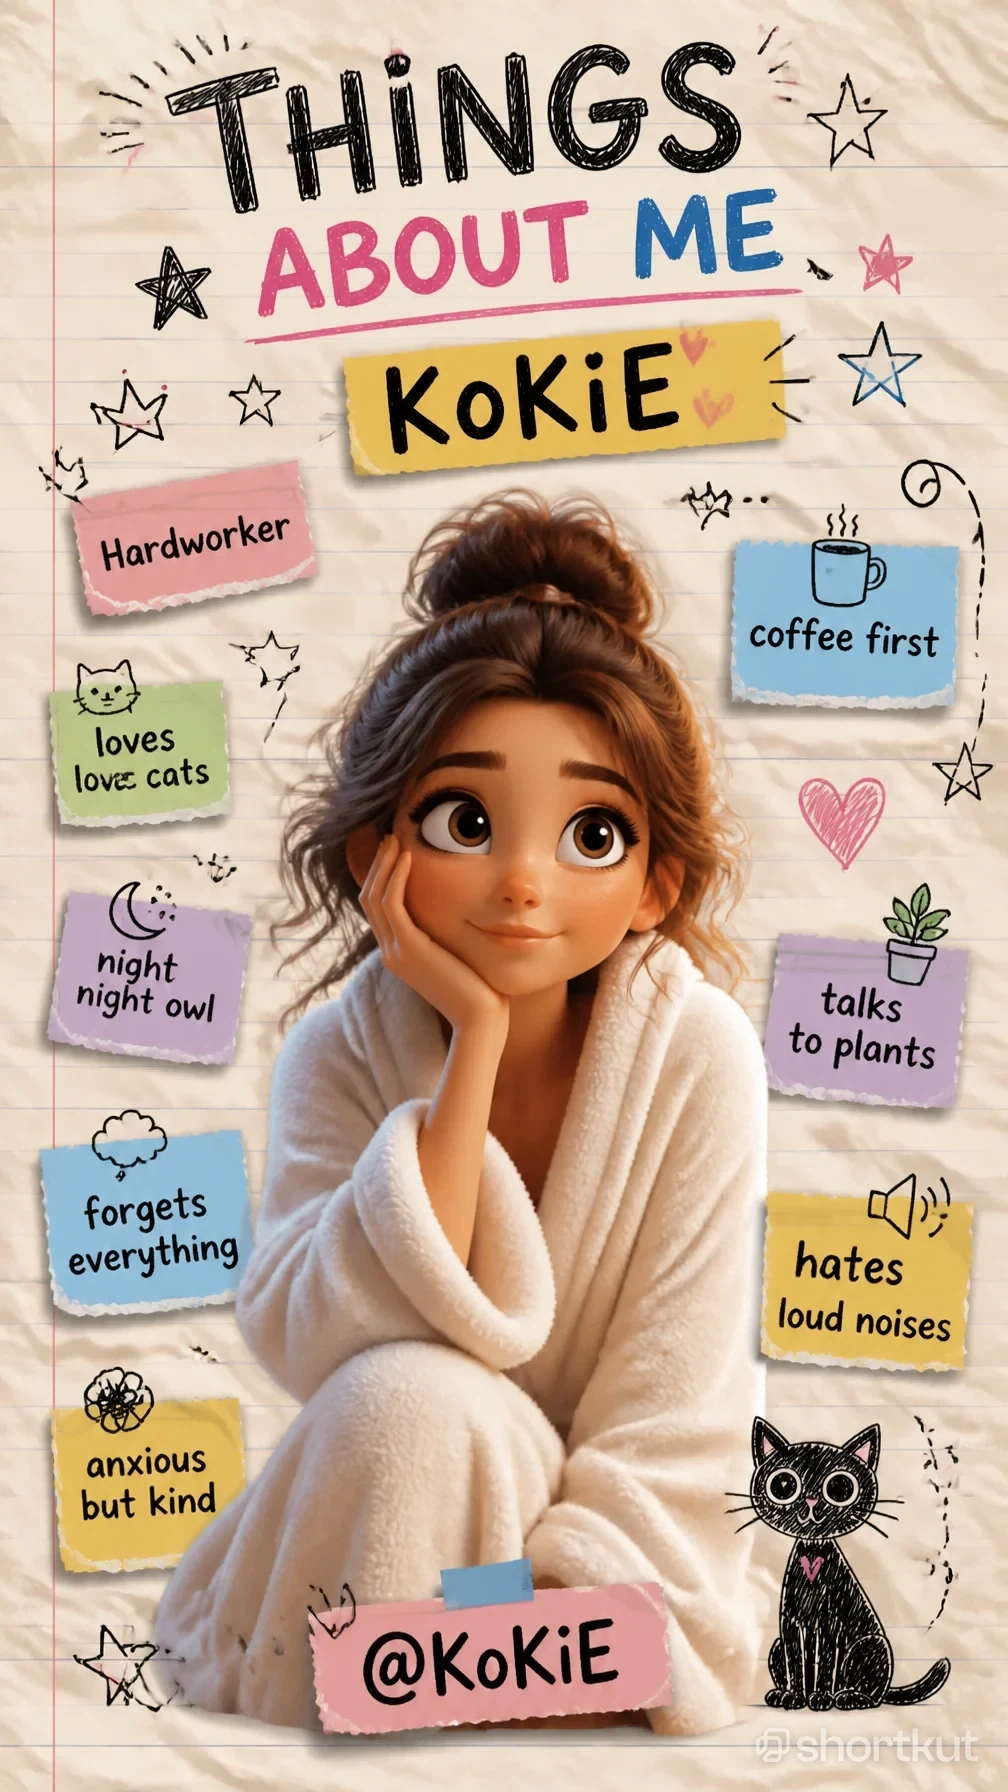
NewPrompts
Hyper Realistic 3D Render in the Style of Pixar Animation
Create a personalized 3D character scrapbook poster using the uploaded person’s photo as the sole identity reference. No additional style-reference image is needed.CUSTOMIZETITLE LINE 1: [THINGS]TITLE LINE 2: [ABOUT ME]NAME: [KOKIE]HANDLE: [@KOKIE]LEFT NOTES, TOP TO BOTTOM:1. [Hardworker]2. [loves cats]3. [night owl]4. [forgets everything]5. [anxious but kind]RIGHT NOTES, TOP TO BOTTOM:1. [coffee first]2. [talks to plants]3. [hates loud noises]Use the supplied wording exactly, without printing the brackets. Omit any blank field and rebalance the layout. Do not repeat words, invent additional personality traits, or add unrelated text.IDENTITY AND 3D TRANSFORMATIONTransform the uploaded person into a polished, expressive 3D animated character while preserving their recognizable identity.Retain the person’s distinctive face shape, skin tone, eye color, eyebrow shape, nose, lips, hairline, hair color, and identifying features. Preserve facial hair and glasses if present. Translate these features into coherent three-dimensional character design.Use gently enlarged expressive eyes, rounded facial forms, softly sculpted cheeks, a simplified but recognizable nose, and a subtle friendly smile. Keep the characteristic spacing and relationships between features so the result looks like a stylized version of the uploaded person.The entire face must use the same 3D rendering style as the hair, ears, neck, hands, and body. Do not paste a photographic face onto an animated body. Do not replace the person with a generic cartoon character, change their ethnicity, or turn an adult into a child.Use warm skin shading, subtle subsurface scattering, soft highlights, glossy eyes with clear catchlights, and dimensional hair strands grouped into natural sculpted locks. Avoid plastic toy surfaces and exaggerated caricature.FORMAT AND COMPOSITIONVertical 9:16 poster, designed as a handmade notebook scrapbook page.Use warm cream, lightly crumpled paper with fine horizontal pale-blue notebook rules and one thin faded-red vertical margin line near the left edge. Show realistic paper fibers, gentle wrinkles, and softly shaded creases.Divide the composition into:• Top quarter: large hand-drawn headings and a torn-paper name label.• Middle and lower area: the seated 3D character, surrounded by small personality-note cards.• Bottom: a taped handle label in front of the character and a hand-drawn cat at the lower right.The character occupies roughly the central 60% of the width. Keep the face near the horizontal center, about 46% down the canvas. Arrange notes beside the character without covering the face.CHARACTER POSE AND CLOTHINGSeat the character comfortably with one bent knee raised in the foreground. Lean their cheek into the palm of the hand on the viewer’s left, with the elbow supported naturally by the raised knee. Keep the other arm relaxed near the lap.Angle the eyes slightly upward toward the viewer’s right, with a gentle, thoughtful smile. Maintain believable hand anatomy and a softly compressed cheek where the palm touches it.Dress the character in a plush ivory fleece bathrobe with a thick folded collar, oversized sleeves, and a closed, comfortably wrapped front. Render fine fuzzy fibers, soft folds, and warm shadows. Keep the pose cozy and fully covered.Preserve the source hairstyle’s defining characteristics. If the person has long hair, loosely gather it into a messy high bun with a few face-framing strands. If their hair is short, retain its length and recognizable silhouette rather than inventing a bun.HEADER DESIGNPlace TITLE LINE 1 across the top in very large, irregular black uppercase lettering, with visible scribbled crosshatching inside the strokes. Give the letters a playful hand-drawn rhythm.Below it, place TITLE LINE 2 in bold, slightly uneven uppercase lettering. For the default “ABOUT ME,” use dusty pink for “ABOUT” and medium blue for “ME.” For replacement wording, distribute these two colors across the words while keeping the t
Comments