

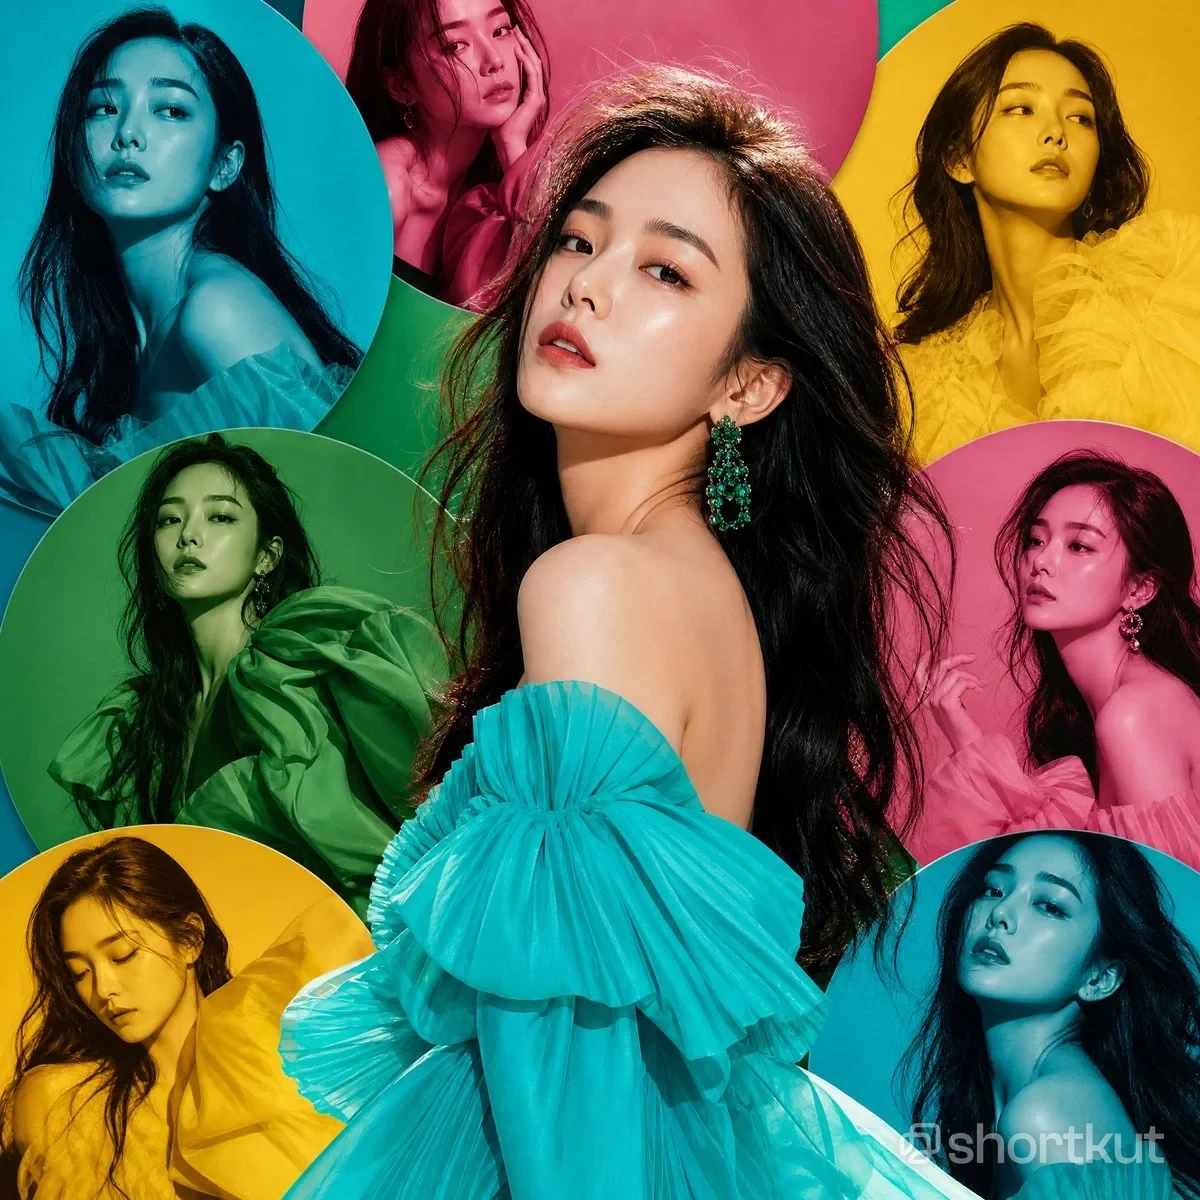
Create a photorealistic high-fashion portrait collage using the uploaded photo as the sole identity reference. Build the entire composition from the description below; no additional reference image is needed.

FACE AND IDENTITY — HIGHEST PRIORITY
Use the same person from the uploaded photo in every portrait. Preserve their facial structure, proportions, eyes, eyebrows, nose, lips, jawline, cheeks, skin texture, age, and distinguishing marks. Preserve their hairline, hair color, and facial hair where present.

Do not beautify, reshape, slim, smooth, or replace their face with a generic model. Keep natural asymmetry. For the main portrait, retain the uploaded face’s expression, gaze, and head angle wherever possible, adapting the body pose around it. Preserve original face pixels where the editing system supports this.

The smaller portraits must remain recognizably the same person. If a different head angle or expression would compromise identity, reuse the original facial angle and create variety through cropping, shoulder position, clothing, and color treatment instead. Colored overlays may tint the face, but must not change its features.

CANVAS AND COMPOSITION
Square 1:1 canvas. Create a dense, edge-to-edge editorial collage containing exactly eight appearances of the same person: one large central portrait in natural color and seven smaller portraits inside overlapping circular panels.

The central portrait is the dominant foreground layer, overlapping the circles and concealing portions of their edges. Frame it from the top of the head to approximately the waist, with the gown cropped by the bottom edge. Position the head near the upper center, the face around 52% across and 27% down the canvas. Let the shoulders, hair, and sculptural dress fill the center and lower half.

Use crisp circular masks with fine, pale outlines. Several circles extend beyond the canvas edges. Fill gaps with saturated emerald-green and teal shapes. No white margins or empty background.

CENTRAL PORTRAIT
Pose the body in a three-quarter turn with one bare shoulder toward the camera and the face looking back toward the viewer, provided this is compatible with the uploaded face’s angle. Keep a poised, relaxed expression without changing the person’s original facial features.

Preserve the person’s hairstyle and length. For long hair, allow loose, softly tousled strands to fall behind the shoulders and along the viewer’s right side. For short hair, retain its natural shape and use the background circles to balance the composition.

Dress the person in a vivid turquoise off-the-shoulder couture gown made from translucent, finely pleated organza. Create oversized fan-shaped ruffles around the upper arms and bodice, layered into large sculptural folds. The fabric expands across the bottom of the canvas, with crisp pleat ridges, translucent edges, bright cyan highlights, and deeper teal shadows.

Add an ornate emerald-green chandelier earring at the visible ear: clustered green gemstones in a dark metallic setting, extending toward the neck.

Keep the central face in natural skin color, with realistic texture and controlled highlights. Do not apply the surrounding monochrome color treatments to it.

SEVEN CIRCULAR BACKGROUND PORTRAITS
Arrange these behind the central figure. Positions are approximate percentages of the square canvas; circles are deliberately cropped at the edges.

1. UPPER LEFT — CYAN
Large circle centered near 12% across and 20% down, approximately 44% of the canvas width. Show a close shoulder-up portrait with a bare shoulder and sheer ruffled fabric. Apply a strong cyan-blue monochrome treatment, retaining dark hair and detailed facial shading.

2. TOP CENTER — PINK
Circle centered near 49% across and 7% down, approximately 49% of the canvas width. Crop it at the top and partially conceal it behind the main head. Show a close portrait with a hand resting lightly beside the cheek, without covering facial features. Apply a saturated rose-pink monochrome treatment.

3. UPPER RIGHT — YELLOW
Large circle centered near 90% across and 20% down, approximately 44% of the canvas width. Show a head-and-upper-torso portrait surrounded by voluminous organza ruffles. Use a golden-yellow monochrome treatment with warm dark shadows.

4. MIDDLE LEFT — GREEN
Circle centered near 20% across and 56% down, approximately 45% of the canvas width. Show a wider upper-body portrait wearing an oversized sculptural ruffled gown. Apply an emerald-green monochrome treatment. Overlap the upper-left circle and place it behind the central turquoise sleeve.

5. MIDDLE RIGHT — PINK
Circle centered near 90%

NewPrompts
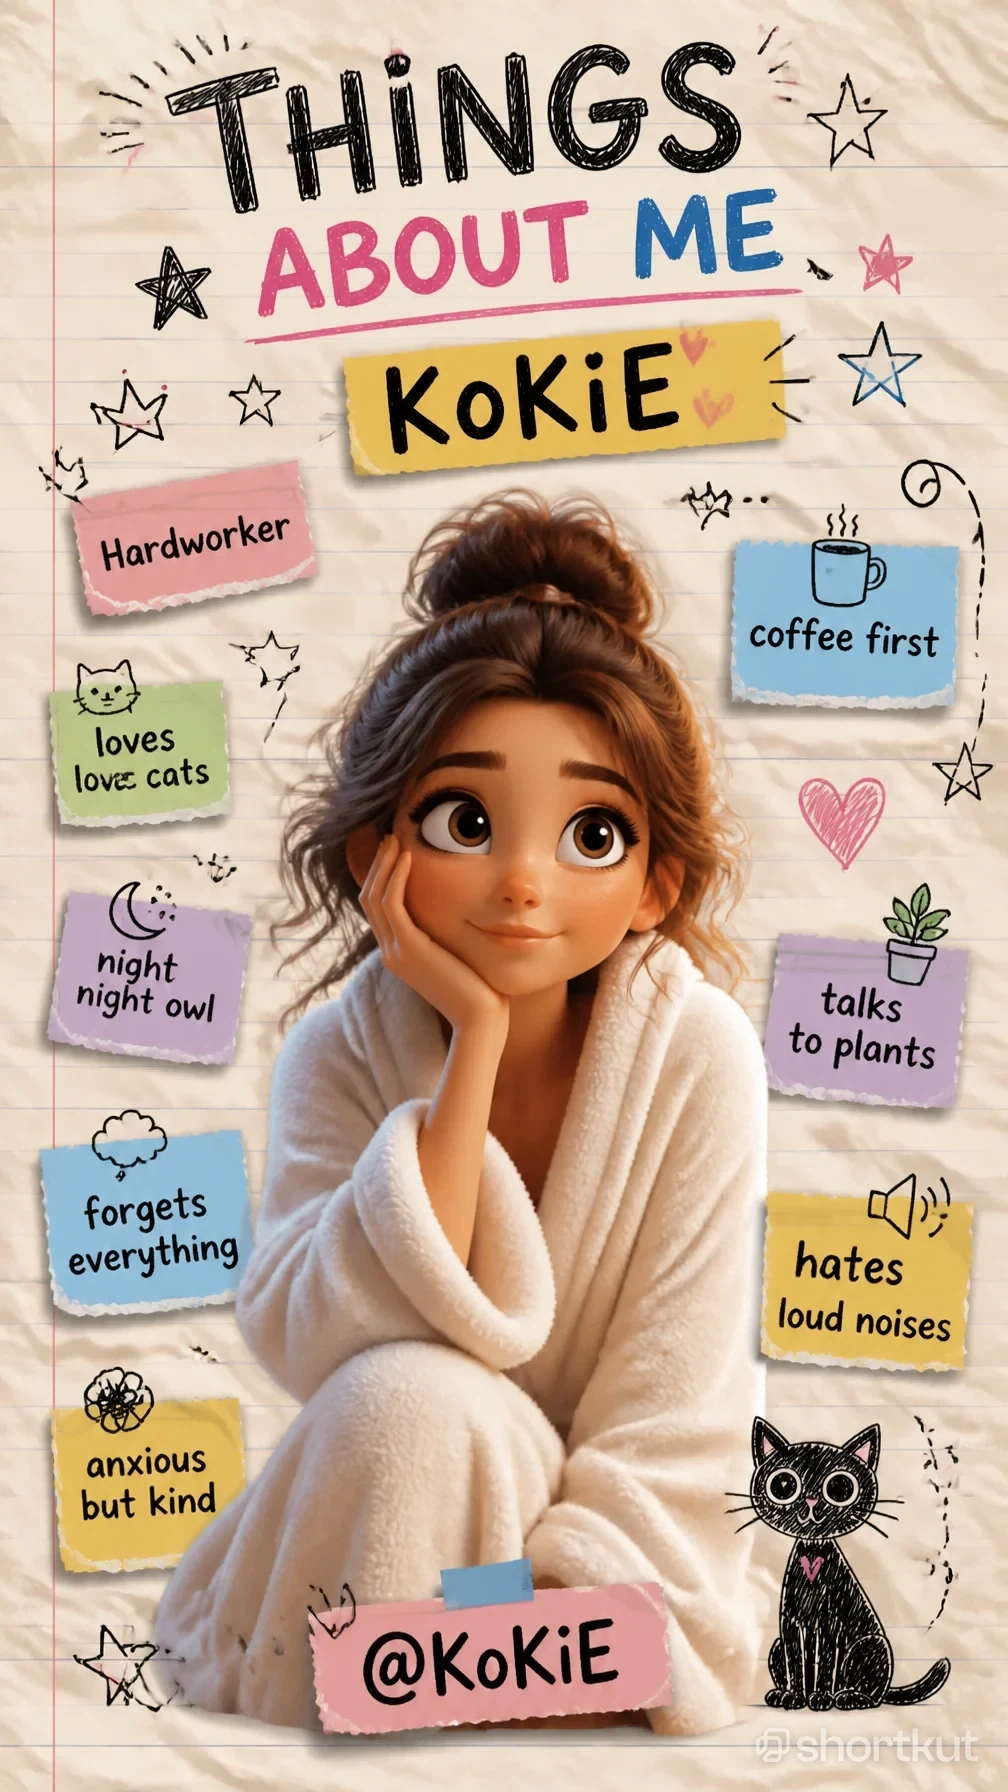
Hyper Realistic 3D Render in the Style of Pixar Animation
Create a personalized 3D character scrapbook poster using the uploaded person’s photo as the sole identity reference. No additional style-reference image is needed.CUSTOMIZETITLE LINE 1: [THINGS]TITLE LINE 2: [ABOUT ME]NAME: [KOKIE]HANDLE: [@KOKIE]LEFT NOTES, TOP TO BOTTOM:1. [Hardworker]2. [loves cats]3. [night owl]4. [forgets everything]5. [anxious but kind]RIGHT NOTES, TOP TO BOTTOM:1. [coffee first]2. [talks to plants]3. [hates loud noises]Use the supplied wording exactly, without printing the brackets. Omit any blank field and rebalance the layout. Do not repeat words, invent additional personality traits, or add unrelated text.IDENTITY AND 3D TRANSFORMATIONTransform the uploaded person into a polished, expressive 3D animated character while preserving their recognizable identity.Retain the person’s distinctive face shape, skin tone, eye color, eyebrow shape, nose, lips, hairline, hair color, and identifying features. Preserve facial hair and glasses if present. Translate these features into coherent three-dimensional character design.Use gently enlarged expressive eyes, rounded facial forms, softly sculpted cheeks, a simplified but recognizable nose, and a subtle friendly smile. Keep the characteristic spacing and relationships between features so the result looks like a stylized version of the uploaded person.The entire face must use the same 3D rendering style as the hair, ears, neck, hands, and body. Do not paste a photographic face onto an animated body. Do not replace the person with a generic cartoon character, change their ethnicity, or turn an adult into a child.Use warm skin shading, subtle subsurface scattering, soft highlights, glossy eyes with clear catchlights, and dimensional hair strands grouped into natural sculpted locks. Avoid plastic toy surfaces and exaggerated caricature.FORMAT AND COMPOSITIONVertical 9:16 poster, designed as a handmade notebook scrapbook page.Use warm cream, lightly crumpled paper with fine horizontal pale-blue notebook rules and one thin faded-red vertical margin line near the left edge. Show realistic paper fibers, gentle wrinkles, and softly shaded creases.Divide the composition into:• Top quarter: large hand-drawn headings and a torn-paper name label.• Middle and lower area: the seated 3D character, surrounded by small personality-note cards.• Bottom: a taped handle label in front of the character and a hand-drawn cat at the lower right.The character occupies roughly the central 60% of the width. Keep the face near the horizontal center, about 46% down the canvas. Arrange notes beside the character without covering the face.CHARACTER POSE AND CLOTHINGSeat the character comfortably with one bent knee raised in the foreground. Lean their cheek into the palm of the hand on the viewer’s left, with the elbow supported naturally by the raised knee. Keep the other arm relaxed near the lap.Angle the eyes slightly upward toward the viewer’s right, with a gentle, thoughtful smile. Maintain believable hand anatomy and a softly compressed cheek where the palm touches it.Dress the character in a plush ivory fleece bathrobe with a thick folded collar, oversized sleeves, and a closed, comfortably wrapped front. Render fine fuzzy fibers, soft folds, and warm shadows. Keep the pose cozy and fully covered.Preserve the source hairstyle’s defining characteristics. If the person has long hair, loosely gather it into a messy high bun with a few face-framing strands. If their hair is short, retain its length and recognizable silhouette rather than inventing a bun.HEADER DESIGNPlace TITLE LINE 1 across the top in very large, irregular black uppercase lettering, with visible scribbled crosshatching inside the strokes. Give the letters a playful hand-drawn rhythm.Below it, place TITLE LINE 2 in bold, slightly uneven uppercase lettering. For the default “ABOUT ME,” use dusty pink for “ABOUT” and medium blue for “ME.” For replacement wording, distribute these two colors across the words while keeping the t
Comments